
Habitat pipelines in Azure DevOps
27 Sep 2019 | habitat applications pipeline ci/cdSummary
I’ve been doing some work related to building and deploying Habitat artifacts using Azure DevOps so I thought I’d blog the basic steps so future me can set it up again…
Notes
For this post, I’ll be storing my code in GitHub then using the pipeline components in ADO. Also, we’ll be using ADO’s new Multi-stage pipelines for these examples as they let us store all of our steps in a single yml file.
While the pipelines are stored in a single yml file, there are really two main parts: Build and Deployment. The build tasks are handled in a single stage while the deployment tasks are broken into three separate stages. This gives us the ability to follow a standard dev, stage, prod deployment model.
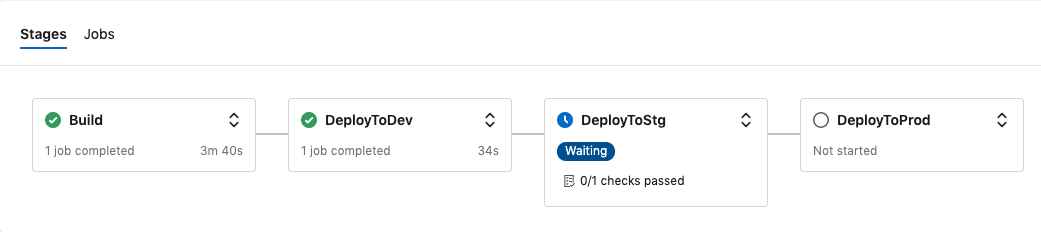
The build stage is very simple. It uses the Habitat extension for almost all its steps. The three deployment stages only differ in one spot. The DeployToDev stage performs a hab pkg upload... while the DeployToStg and DeployToProd stages execute a hab pkg promote ... for their respective channels.
The pipelines are generic as they source the last_build.ps1/last_build.env files from the build. This allows us to pull the artifact name and the package identifier from the build.
Usage
To consume these pipelines, copy the appropriate yml file from this repository into the root of your project. See my Wildfly repo for an example. The Habitat extension expects the hab specific components to be in a habitat/ subdirectory within your project.
Example
Let’s walk through an example. Before we get to the actual ADO setup, let’s do a couple prep steps.
- First, we need to make sure our repo is set up correctly.
- The generally accepted best practice is to put your Habitat related files in a
habitat/subdirectory. - We also need to put our
azure-pipelines.ymlfile in the root of our repo.
├── README.md
├── azure-pipelines.yml
└── habitat
    ├── config
    │   ├── standalone.conf
    │   └── wildfly.xml
    ├── default.toml
    ├── hooks
    │   ├── init
    │   └── run
    └── plan.sh
NOTE: Here are the links to the example repo and the example pipeline files.
- The generally accepted best practice is to put your Habitat related files in a
Cool. Now that we have our source repo tuned up, let’s move onto setting up the ADO bits.
- If this is your first foray into ADO, you’ll need to create an organization first.
- Now that we have an org, let’s create a project. Click on the
New Projectbutton.
- Name your project, select the appropriate visibility, and click
Create. - Since BLDR requires signing keys and a token to build and upload packages, we need to give that info to ADO.
- Click on the
Project Settingsin the lower left corner, then scroll down and selectService Connections.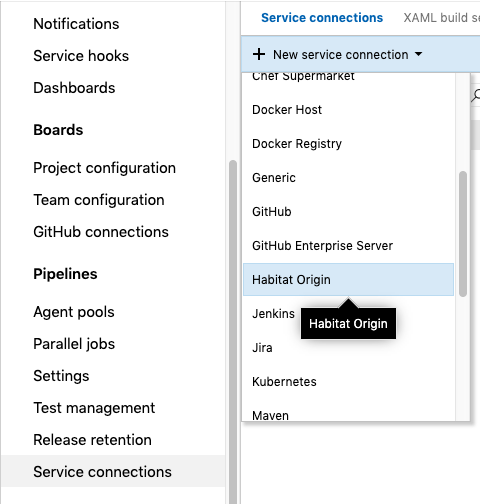
-
Most of these attributes should be straightforward. The only one that isn’t obvious is the
Revision. It’s the timestamp bit in your public key.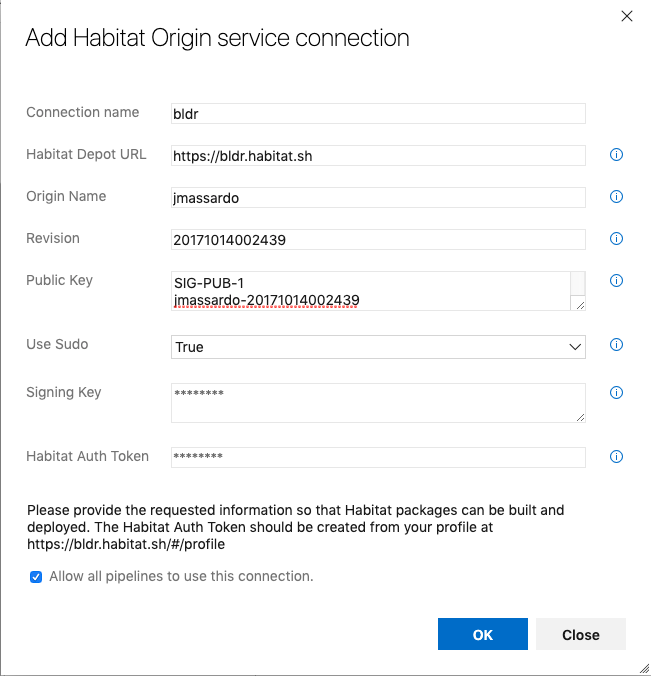
NOTE: You may be wondering about the connection name. You aren’t required to use
bldrfor the name, however, I would recommend that you make it something very obvious. If you do elect to use something different, you’ll need to edit yourazure-pipelines.ymlfile and update the tasks that reference thebldrHabitat Origin. - The final prep step is to create the pipeline environments. Since we’re doing a three stage deployment, we’ll need to create three environments. The reason being, environments have the option for a manual approval check. We want the pipeline to build and automatically promote the new package to our
devchannel, but we don’t want it to immediately promote tostgorprodwithout approval.- On the left-hand sidebar, hover over pipelines, the click Environments.
- Click
New environment, type indevthen clickcreate. Repeat forstgandprod. - Click on the
stgenvironment, then click the vertical ellipsis icon in the top right, and selectChecks. - Click the
Createbutton, select the appropriate user, then click theCreatebutton. - Repeat for the
Prodenvironment.
We’re almost there, the final steps set up the actual pipeline.
- Now click on
Pipelinesfrom the left-hand sidebar, then clickCreate Pipeline - As you can see, we have several options:
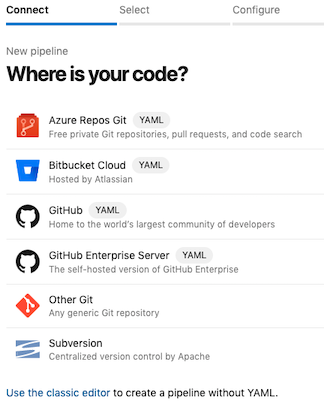
- In our case, we’ll select GitHub (YAML). Then select our Wildfly repo.
- Since we already added the
azure-pipelines.ymlfile to our repo earlier, there’s actually very little to do on theReviewscreen. I normally skim the code to make sure there aren’t any errors from ADO’s linter. If everything looks good, go ahead and clickRun. - From here, we should see the pipeline kick off and start a build of our package.
Closing
Hopefully, you’ve found a couple things that will help you be successful. If you have any questions or feedback, please feel free to contact me: @jennamassardo